The ridge from Pu’u Kawiwi to “No Name” peak.
Last weekend I finally got a chance to hike a trail on the Waianae Range on the west side of Oahu. We followed a loop that takes you through Waianae Kai Forest Reserve, up to Pu’u Kawiwi, over to No Name peak and down Tiki Ridge back into the forest. The trail took almost 8 and a half hours and was the most intense hiking experience I’ve had so far.
The hike starts by making your way through the forest on an unmarked trail. You just have to find your way to the base of Pu’u Kawiwi. From there the climbs are steep and strenuous. Once you get towards the top of the first peak, you have to scramble and climb rocks that crumble upon being touched (at an elevation close to 3,000 ft). The ridge to the second peak, No Name, is the craziest and most knife-edged ridge I’ve hiked so far. There were several moments that I feared for my safety or the safety of my companions. Once you make it to the second peak, you’re not yet out of the woods. Literally. You still have to make your way out of the woods. And if you start in the late-morning like we did, you’ll have to do this in the pitch-dark. On a trail that’s not marked.
If this sounds fun to you then you’re probably an experienced hiker so read on. If this sounds horrible, you might not like this one. For us, it was exhilarating and completely rewarding.

The trail starts at the end of Waianae Valley Road. We had a crew of strong hikers on this outing. I joined Reanne, Seth, Jen, Jen, Troy and Cory for this adventure.

Make your way up the paved service road and keep looking left.

As you look left you’ll see a few entrances into the forest. We took this one.

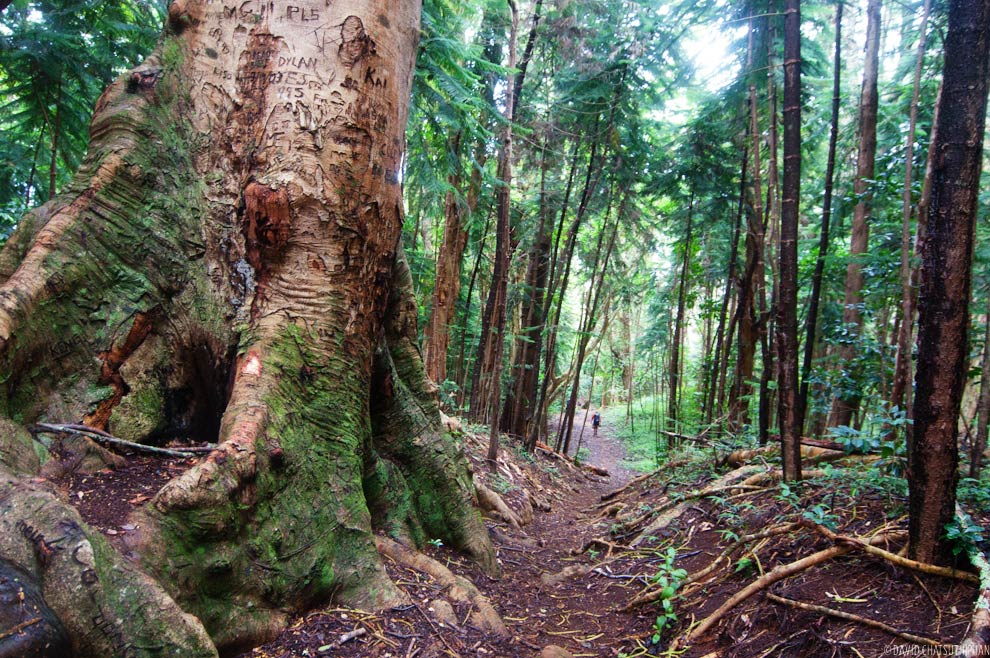
The trail was not marked but there was a discernible path. In any case, we knew we wanted to get to the base of the peak you see through the branches. That’s Pu’u Kawiwi.

You’ll cross a couple streams.

Eventually you pop out of the trees and walk through tall grass to the base of Kawiwi.

And now the ascent begins. It helped that this was a cool day. I see this as a winter hike. Also, note how green Waianae Valley is. We had a big storm hit the island a couple weeks ago and Waianae got plenty rain. The view is not typically this green.

This tall grass is annoying but at least it gives you something to hold on to as you make your way up this steep hillside.

As you get higher up the ridge, you’ll be doing more rock climbing than hiking.

Since you do so much climbing, you gain elevation fast.

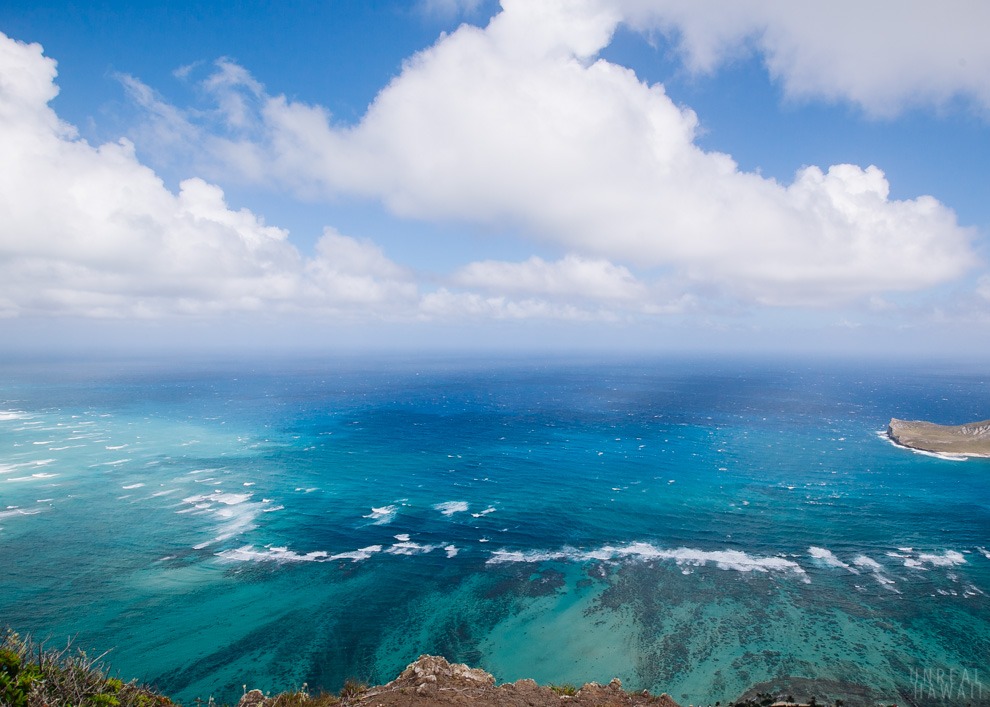
We’re already seeing some gorgeous views. This was the first time I had ever seen Waianae Valley acutally. The view was pretty epic.
 #13
#13
While the trail through the forest is not marked, the ridge up Kawiwi is ribboned. This is extremely helpful as the ridge is treacherous if you go the wrong way. You don’t have to follow the ribbons but if you don’t you could end up on stuck on a steep section that you can’t get down from.

Since this is not exactly a well-known hike, the trail isn’t cleared frequently and you’ll have to push through the trees very often. I still have cuts on my arms from this. Long sleeves would be a smart idea. And take care not to get your eye gouged out.

This is the peak of Pu’u Kawiwi. We’re seemingly almost there, but the going is slow on this ridge.

This section here was super sketchy. The trail along the side of the ridge narrows and narrows until it’s less than a foot wide. But a small shrub grows over it. To get by, you have to grab the base of the shrub and swing yourself around it (as Jen is doing in the picture). So, you’re a couple thousand feet up, your butt is hanging out over the side of a mountain and you’re trusting a shrub to support you’re entire weight. It was good times.

Once you get past that tree you have to climb your way up this steep face of dirt and loose rocks. Keep you team spread out as rocks will come loose under your feet and could crack someone’s head open below.

Much of the hike is like this. When you come to a rock formation you can usually go up and over or around. Take your pick.

Almost at the first peak. These climbing sections wouldn’t be as scary if the rock wasn’t so brittle. The best tip I can give is to climb slow and don’t put your entire weight on one hand or foot hold.

Made it. We’re all smiles and high-fives for getting to the first peak. But, we have no idea how much craziness is ahead of us.

The views are great from up here but don’t dilly-dally. The next section of this trail is even slower going than your ascent so you’ll need all the time you can get.

You’re next task will be to traverse the narrow and rock ridge to No Name peak. Thankfully there’s some webbing in place to make some of the descents less hair-raising.

It’s still hair-raising though. One slip and that’s it.

With that first descent out of the way, keep on making your way across this knife-edge ridge. This is the reason we wanted to do this hike. These ridges are incredibly fun. You feel so free.

You’ll soon encounter a fence. We’re not sure what this is for but one theory is that it could be used to contain goats. The fence is super strong and you’ll use it to help you descend this section. There are parts where you’re using the fence like a ladder. It’s fun, yet sketchy.

My heart was pumping pretty good by the time we got to this point. We’re almost to the second peak now, No Name.

When you get to the top (No Name’s elevation = 3,000 feet), take a short break but again, mind your daylight.

You’ll descend down No Name to that rock formation you see at the top of the picture. That’s the top of Tiki Ridge (which you can see stemming off to the right in the picture).

Once you hit the rock formation stop and look around. You’ll see this strand of webbing.

There are more ropes to help you down this slope. As you go down, keep looking for the ridgeline. Try to veer right.

If you end up in this thatch of dead trees you’re off track. We made our way over to the right and found the narrow ridge.

This is what Tiki Ridge looks like.

The ridge trail is marked by these tiki figures.

As you get to the bottom you’ll see bottle caps markers.

And now you enter the forest. As you can see, dusk is approaching.

Complete darkness sneaks up on you fast. We had three headlamps and three key chain lights between the seven of us. Once darkness fell, we could no longer make out a path through the woods. We were lost. But, we knew East or South East would take us back to the road we started on. And, Waianae Kai Forest Reserve is not all that big. (That’s what I kept telling myself anyway.) But for close to an hour we trodded through the forest on no particular trail hoping to see something familiar. We finally hit the dry stream bed. At that point we also realized we could use the satellite view on Google Maps to see where we were in relation to the dirt road. I had full reception on my iPhone. Turns out we were really close. Everyone unclenched their buttcheeks and 5 minutes later we were out forest.

When we hit the dirt road we all yelled out in relief. We were tired, out of water and hungry. Being lost in the forest was frustrating and slightly nerve-wrecking but the joy of making it out, plus realizing you just accomplished a monster hike put everyone is the best of moods. It was now time to grind.
Tips for the hike:
- Be on the trail no later than 9AM unless you want to navigate the forest in the dark.
- Wear long pants and bring a long sleeve shirt for the overgrown parts.
- Bring at least 3 liters of water. (I had 3 liters and a small Gatorade and I ran out of fluids while descending Tiki Ridge.)
- It’s best to hike the Waianae Side during the color winter months. But, do not go if it’s raining.
See also:
- Learn more about this hike on Island Trails and Hawaiian Forest. Kaleo, Nathan and crew accomplished this hike a couple weeks prior which benefited us as we could follow their trail and use their blog posts as guides.
- You can also hike from Pu’u Kawiwi to No Name to Ka’ala