

The view from deep in the back of Kahana Valley.
Here’s what we’re looking at from left to right: Kahana Valley, Pu’u Manamana, Ka’a’awa Valley, then Pu’u Kanehoalani. So how do you see this view? Hike up to Pu’u Ohulehule.
Pu’u Ohulehule is the pyramid shaped mountain that sits in the back of Kahana Valley. (The word “pu’u” can be translated “hill” or “mountain” by the way.) There’s a trail that starts at Ahupua’a ‘O Kahana State Park (formerly Kahana Valley State Park) that takes you through the valley and up to the very top of the mountain. You’ll hike 8 miles round trip and including breaks, it takes about 8 hours to complete.
The trail up Pu’u Ohulehule is known as one of the most difficult on Oahu but don’t let it’s reputation deter you. It’s advanced but doable. You’ll have different types of terrain to explore including stream crossings, rain forests, narrow ridgelines and vertical climbs. The trail will take a lot out of you but the experience is worth it.

This park is known as a “living park” which I believe means that people live here. There’s a housing area back here where 31 families live and supposedly foster native Hawaiian cultural traditions. It’s in this housing area where you start the trail. You park just outside of the neighborhood and walk down their street to the trailhead.

Jack, Justin, Reanne, Vuthy and I started the hike at around 9:45am. Here we are with crisp treads, dry shoes and looking fresh and clean. This will soon change.

At the end of the road you come to a hunter check-in area. Sign in if you’re want someone to know you’re in there. We weren’t hunting but I signed in.

You hook a left at the sign and walk down this road.

You come to your first stream crossing right away where you say goodbye to dry feet for the rest of the hike. But, the funny thing is, you don’t really notice the soggy shoes and socks. You’re too busy focusing on the trail.

When you hit this fork in the road, jump off the Nakoa Trail and hook this left.

Again, right away you’ll hit your second stream crossing. You have to wade through this one. I brought a waterproof bag for my camera just in case.

The third stream crossing comes up shortly after.

There’s one more stream crossing left but it takes a good 20 or so minutes to get to it. You walk through the forest for a bit and then come to an exposed area full of wild orchids. When you hit this area, look for the pink ribbon on your left.

When you hit that ribbon, you’ll begin your decent down toward the stream.

Here’s the fourth and final crossing. It’s a good place to ring out your socks if you want.

After the final stream crossing the trail takes you deeper into the valley until you reach the base of Pu’u Ohulehule. That cloud covered peak in the center is the objective.

Now it’s time to begin your seemingly relentless ascent. This is the fun part.

The trail is steep but there are plenty ropes and roots to help you up.

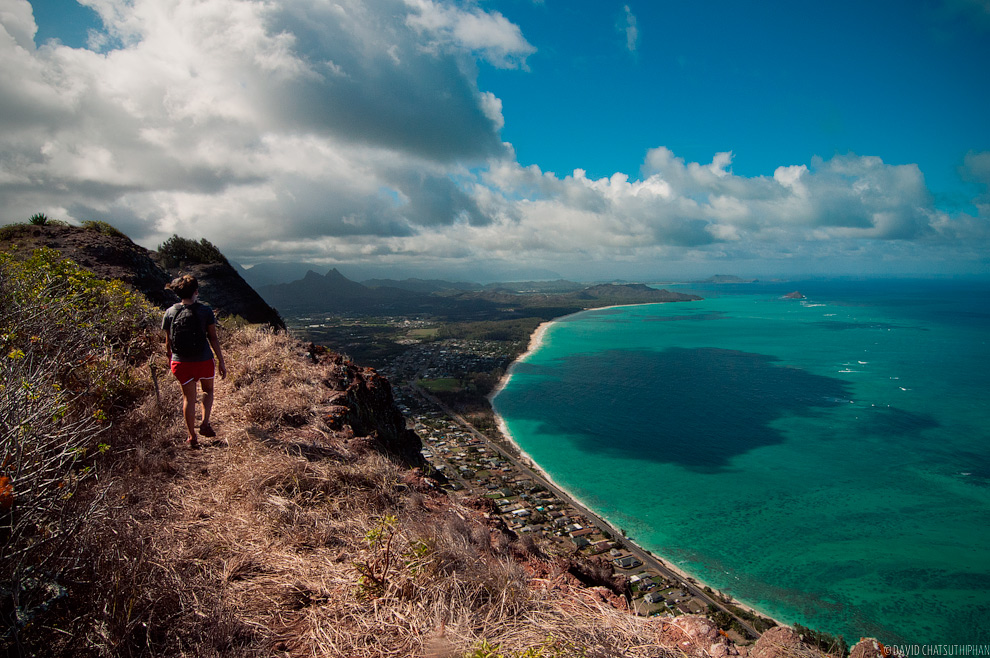
After the first incline section you’re rewarded with a great view of Kahana Valley. The ocean breeze hits you now which is refreshing and necessary. The next section involves near 90 degree climbs.

We’re on top of each other at this point. Watch out for loose rocks when you’re hiking like this. If you do kick one loose call out to those below you so they know to cover their heads.

Here’s another rest stop. We’re almost at the top now but the next, hiking (or climbing) section is the hardest.

I’m on the steep ridge of Ohulehule here but this rope is helping me.

Oops, did I say rope?

Almost to the top now. You can see that although the ridge is steep, there are plenty of trees on it that give you a sense of comfort. If you were to slip and fall you’d probably be able to catch yourself on one of these branches. (Theoretically.)

And here it is: the peak. We’re about 2,200 feet up. You can see the face of the mountain on the left, and the trail on the right that continues through a tunnel of trees.

You continue through that tunnel of trees around the peak to a clearing.

Now rest, eat lunch and pat yourself on the back. Sadly for us, the cloud level was low and we didn’t have a view. It’s supposed to the one of the best on the island. But that’s how it goes. I do want to do this hike again though on a clear day.

Coming down the trail, you’re treated to the view of the valley the entire way. Those steep sections are much easier to get down than you would think. The ropes help a lot.

What does get tiring is all the overgrown sections of the trail. We’re neck deep here.

What also get’s tiring is the thrashing your legs take if you wear shorts. In some parts of the trail there are these plants with saw like leaves.

I saw three ribbons at one point in the trail. Anyone know what this means?

We took many breaks on the way back to rest our weary legs. Going down can be harder than going up, especially on the knees.

I love me some nature and all but after 8 miles, a paved road is a welcome site. We walked back through the neighborhood (being sure to wave “hi” to the friendly people we passed) to the car.

When it was over, all of us were soaked from head to toe. We were covered in mud, mosquito bites and cuts but it was all smiles for the group.

Time to drive home.
…
Hiking tips:
- Wear pants.
- Bring strong insect repellent spray for the mosquitos.
- Choose a clear dry day.
See also:
- Getting to the trail: Pu’u Ohulehule on Google Maps
- Definitely check this out: Justin’s Pu’u Ohulehule video on Vimeo
- Two write ups I used as a guide while on the hike: “Island Trails: Pu’u Ohulehule” and “The Hawaiian Trail and Mountain Club Trail Report Pu’u Ohulehule“
- I used this video to help convince people to do this hike: Island Trails – Pu’u Ohulehule video on Vimeo


