The hike starts by climbing the two Pali Notches and then up this … the Chimney.

You’ll follow the Koolau Summit Trail (KST) up to Pu’u Konahuanui. This pu’u (or mountain) has the two highest peaks on the Koolau mountain range. The peaks are known by hikers as K1 and K2.

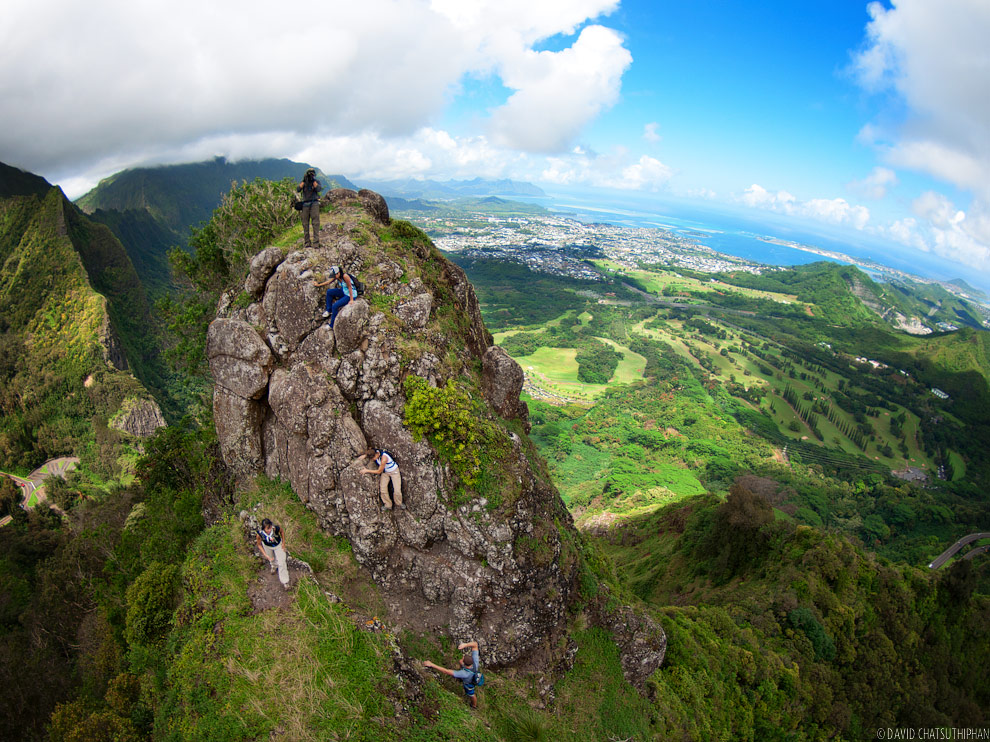
The views from up here, at just over 3,000 feet up, resemble those from a helicopter.

Hiking the Koolau Summit Trail from the Pali Lookout to Manoa. East Oahu, Hawaii.
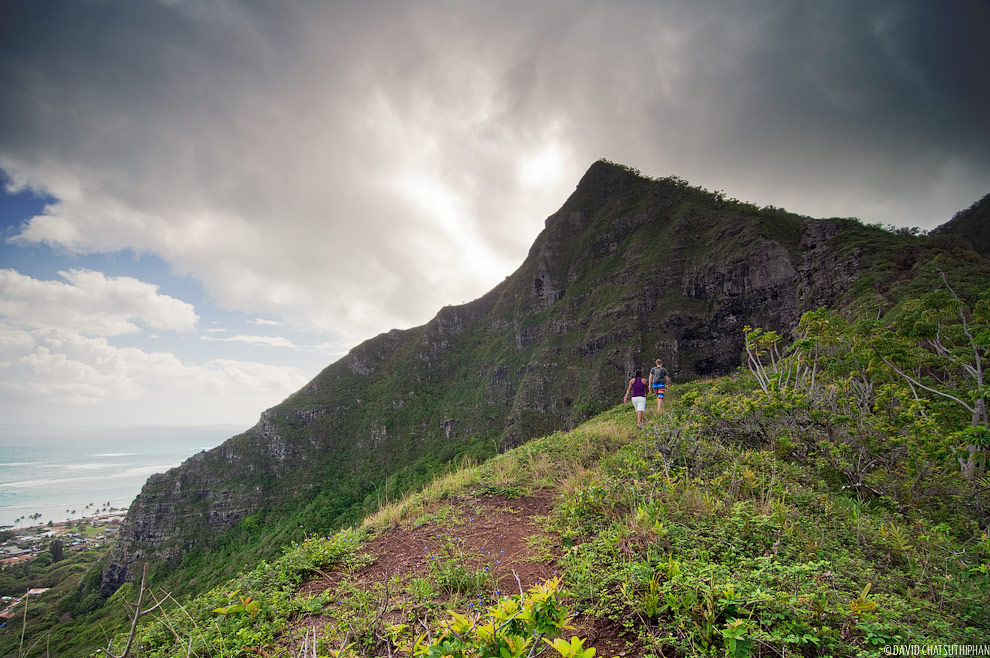
Past Konahuanui you can follow the KST (the long ridge that can be seen above) for as long as you like. We completed this hike by hiking down into Manoa Valley via the Manoa Middle ridge.
This is an extreme hike.
Here’s a little info on the KST:
As you probably know, the mountain range on the East side of Oahu is called the Koolau Range. The mountain range crosses the entire island from Makapu’u (southeast Oahu) to Pupukea (on the North Shore). When you look at the range on a topographic map, you can see a well defined crease or spine that spans the entire range. That crease is the narrow summit ridge of the mountain range and on it sits the Koolau Summit Trail. If you follow the KST, you can connect all the peaks of the Koolaus. But people that hike the KST typically break it up into sections. To hike the entire trail from Makapu’u to Pupukea would take days and solid mountaineering skills.
Baron’s goal as a KST hiker was to hike (in sections) the KST from Makapu’u to the Pali Lookout. Prior to this hike he had just one small section left and, on this day, he completed it.
The rest of us had two goals: climb the Chimney and obtain the summit of the highest point on the Koolaus.
DISCLAIMER:  The trail and activity descriptions are given to showcase the beauty of the Hawaii outdoors. This information is not intended to give specific advice on any trail or activity nor is it a recommendation to attempt the trail or activity.  The writer and/or publisher of this website is not responsible for any accidents, injuries, rescues, inconvenience, or loss of life by anyone attempting any of the hikes or activities on this website. It is the responsibility of the reader to use common sense and good judgment by interpreting and using the information to safely enjoy any outdoor activities. Hiking and any outdoor activity can be dangerous and has many potential hazards. It is up to each individual to know their limits, abilities and level of expertise before attempting any outdoor activity.

The hike starts with a steep incline.

Hike up the steep slope through a tangle of hau branches.

Baron and Reanne take in the views of Mt. Olomana, that small hill in the distance.

Cory, Justin and Troy come up over the first hump.

The cloud covered peak above is Konahuanui.

Descend the first of the man-made Pali Notches.

Then descend into the second, and more sketchy notch. There was a rope laid down for us to use this time, however, even with the rope you’ll need advanced climbing skills or a good guide to descend this notch.

You can see the Pali Lookout parking lot from this point.

Now comes the most mentally challenging part of the hike, the climb up the Chimney. Baron makes his way to the Chimney by going over a knob like formation.

I took the low route and contoured around the knob.

At the base of the Chimney the crew prepared themselves for the climb. Cory, Reanne and I put on rock climbing shoes for this section. In my opinion they helped immensely. With the shoes on, I was able to place my feet in cracks and use them to push off of. This would have been impossible to do in my hiking boots. Baron took off his shoes and climbed barefoot for this same reason.

We climbed the Chimney one at a time.

Once you get to the top of the Chimney you can see how the rope is anchored. Baron had used this rope before and we were able to use it with confidence. However, just because there is a rope there, don’t assume it’s safe to use. Ask around in the hiking community about the age and condition of the rope before attempting this climb.

Once you’re past the Chimney there’s still much more climbing to do.

Cory completes the last stretch of scrambling. From here you can put back on your hiking shoes.

You’ll need shoes with some good grip because from here on, the “trail” is steep and made up of grass, shrubs and some section of loose dirt.

The trail turns into this. You’ll be weaving through and around some dense foliage.

Some sections require climbing up near vertical faces using only vegetation for hand and foot holds.

Don’t trip here.

Troy and Justin are about to enter what Baron considers the most dangerous part of the hike. It’s a 30 foot vertical climb up a chute of mud. The last time he had done this hike there was no rope to use and you had to climb it using only a few tree branches. This time, we were able to use a rope left by Nate Rubio and crew (see his write up of their hike from the Pali Notches to Piliwale Ridge). Whether or not the rope is still there is anyone’s guess.

Once you’re up the mud chute you’ll have a bit more extreme ridge walking to do. But, you’re getting really close to the summit of Konahuanui.

Just before the summit we spotted this ribbon marking the trail down to Piliwale Ridge. It was pretty cool to see this ribbon as LM, DO and PC are Laredo Muredo, Duc Ong and Pete Clines – three comrades in the Bushwackers hiking group. Dudes are very active Hawaiian Trail and Mountain Club (HTMC) trail clearers and some of the most extreme hikers out there. You can read about their adventures on the Extreme Hiking Hawaii blog.

At the top of Konahuanui you’ll run into mud. Baron warned us that it’s always muddy up here.

You’ll know you’re at the summit of K1 when you reach a small clearing. K1 is a junction and I believe there are a few ridges you use to get down from here.

We kept going on the KST to K2, the second peak of Konahuanui.

Reanne pushes through the overgrowth with K2 in sight.

The views past K1 were incredible. You can see all of the KST to Makapu’u.

Hike through a bit of mud to get to K2.

You’ll see this marker at the clearing on K2.

After a break at K2 we pushed on towards Manoa.

We paused for another break to soak in this view of the KST.

Looking towards the right you’ll see Diamond Head and Honolulu.

Baron was able to name all the main peaks along this ridge. For each peak, there’s typically a way to get back down to sea level. You could go down Tantalus, Mt. Olympus, Ka’au Crater, Lanipo, etc, etc. It just depends on how long a hike you’re up for.

More extreme ridge walking.

At this small clearing we took another break to enjoy the view. It’s easy to forget to do this when you’re on a mission to get to your destination.

View of Manoa Valley.

The pink ribbon Justin is reading is the marker for Manoa Middle. This would be our path down from the Koolaus.

The great thing about coming down Manoa Middle is that it’s direct. You don’t won’t be going up and down over and over again.

Hike down the ridgeline through the trees.

The ridge will take you down to Waiakeakua Stream.

A high five was in order with Baron who completed his KST hiking goal on this day.

We crossed the stream a few times.

Hiked through the Manoa forest.

Through some bamboo.

And back out to the street. We had staged cars in the back of Manoa Valley and we used them to drive back to the Pali Lookout.
DISCLAIMER: I’m not in any way recommending that you do this hike. If you want to do this trail, please know that you are risking your life. The intention of this set of photos is to show what’s possible. I’m simply documenting what has been done. This write up of the hike is incomplete and therefore should not be used as a guide.
See also:
- Justin’s video of the hike on Vimeo.
- I first learn about this hike from David Concepcion’s website – DGC’s Hawaii Hiking Tales: 2-19-2011: Pali Notches to Konahuanui K1
- Same start different finish: Pali Notches to Piliwale – The Hobbit and Shire.
- Pete Clines’s write up of this hike on Extreme Hiking Hawaii: Pali Notches to Piliwale — Pete Clines
- More info on the KST: Hiking the Koolau Crest – Dayle Turner